How many times have you watched your horse reach to scratch his leg or his back? Have you ever had him reach out to you for a carrot? Did you ever wonder about what happens in his neck as he does these movements? If so, you may have realized that he has the advantage when it comes to sticking his neck out.
While the horse’s neck is much longer than ours, we both have the same number of neck vertebrae. All mammals except manatees and sloths have 7 cervical vertebrae. The individual cervical vertebrae range in size; giraffe neck vertebrae are much larger than humans or horses. Owls have 14 cervical vertebrae, which allow them to turn their heads three-quarters of the way around a circle in either direction. Just imagine how little each one must be!
Both the human and horse cervical vertebrae have the same names and similar types of movements. The difference is due more to orientation, horizontal for the horse and vertical for you, rather than design.
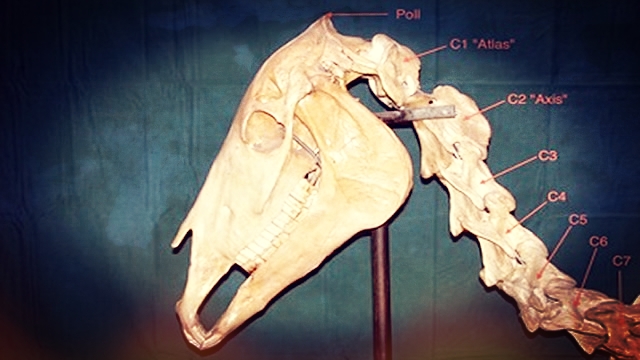
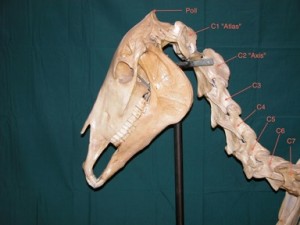
Cervical (C) vertebrae are often referred to as C1 – C7, with C1 starting from the head. The first two vertebrae also go by other names, atlas and axis. The atlas (C1) meets the skull. Think of your head resting upon C1 like the world resting on Atlas’ shoulders. C2 is the axis, which allows the head to rotate on the top of the spine like the earth on its axis. The remaining cervical vertebrae are typically referred to as C3 – C7. (Photo 1)
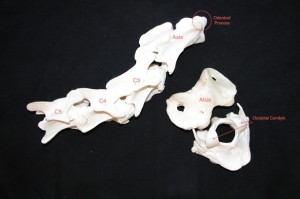
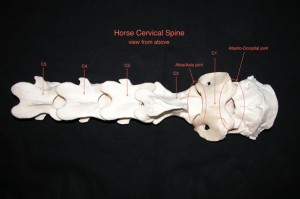
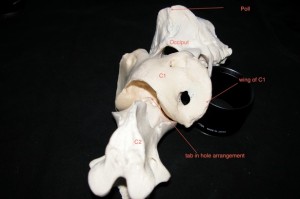
The atlas and axis are unique in that they have a much greater range of motion than the remaining five. The joint where the skull meets C1, the atlanto-occipital joint, is designed for a tremendous amount of flexion and extension. There are two occipital condyles where the skull meets C1, which allows a rocking motion. (Photo 2) When your horse reaches out for a carrot with his muzzle, he extends this joint as his chin moves forward. (Photo 3) When he flexes correctly at the poll, he is flexing at the atlanto-occipital joint. (Photo 4)
The atlas/axis joint, the joint between C1 and C2 is extremely specialized and allows the horse to rotate his head. Hold a carrot high and to the side so that your horse has to tip his nose up to grab it. Notice that his ears are no longer level; therefore, he has rotated at C2.
To understand how these first two joints (atlanto-occipital and atlas/axis) move, do the following: Place the knuckles of your index and middle finger of your left hand against the grooves of the same fingers on the right hand. Move your left elbow up like your horse’s face reaching out. Notice how your knuckles stay on track in the grooves. This is basically how the skull and C1 move in relation to each other. Nod your head “yes” as a very tiny movement up and down imagining this joint between your ears, which is just like in your horse.
Make a circle with the thumb and forefinger of your left hand. Insert your right thumb into the hole. The “thumb” on the axis is called the odentoid process. This is how the C1 and C2 join together, like a tab in a hole. (Photo 5) Notice that you can rotate the tab in the hole or the hole around the tab. This arrangement allows head rotation. If you turn your head a little to the left and right, by shaking your head “no” you would be turning primarily in this atlas/axis joint.
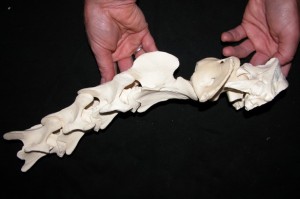
Now here’s where orientation comes in. When you say “no” you move your head left and right. But when the horse makes this movement he rotates his head side to side because he stands horizontally. While your ears will stay level his ears will not. Therefore, if you ever see your horse’s ears unlevel, you know he has rotated at the atlas/axis joint in his neck.
Take your left ear towards your left shoulder. You use all the vertebrae in your neck for this movement. Each one side bends a little which adds up to the total movement of bending the horse’s whole neck.
To get a feeling of the vertebrae in your horse’s neck, take a few minutes to explore your horse next time you are at the barn. Place the palm of your hand just behind the poll. You will feel a large wing-shaped bone just behind the line of the jaw. This is the wing of the atlas (C1). Explore the edges of the vertebrae; it is the easiest one to find in the horse’s neck.
From there take the palm of your hand and press firmly and gently down the side of the neck. Feel for the same kind of firmness you felt when pressing on C1. See if you can identify each of the cervical vertebrae moving from the poll down the neck towards the chest. Remember that the neck curves downward, so if you are running your hand along the crest of the neck. I doubt you will feel any vertebrae. Depending on how fleshy your horse is, you may be able to feel all of the vertebrae.
Place the palm of your hand on the vertebrae approximately halfway down the next. Put your other hand on your horse’s nose and gently bring his head to the side. Does it make it easier to feel the vertebrae? Have someone else bend his neck while you stand on the other side. As your horse’s head moves away from you, feel for the firm spots. You might even be able to see the outline of the vertebrae as your horse’s head turns away.
Imagine what is happening in the neck vertebrae as your horse stretches for a carrot or looks behind himself. When you ride keep in mind that the neck should express the bend on a circle throughout the entire length from poll to sternum.
An internationally recognized riding instructor/clinician, Wendy Murdoch resides in Washington, VA. Wendy is available for lessons and clinics throughout VA, MD and DE. Her new book, 50 Five Minute Fixes to Improve Your Riding is now available. Check her calendar for upcoming dates or contact Wendy directly wendy@wendymurdoch.com 540-675-2285, to schedule your lesson or clinic.

