Written by Wendy Murdoch
This article originally appeared in Eclectic Horseman Issue No.38
In the past several articles, I have given you some practical exercises to improve mobility in your hip joints (EH #35), find even weight distribution on your two seat bones using a physioball (EH#36) and how to use a blood pressure cuff to improve your half-halts (EH #37). All three articles are designed to improve awareness of your pelvis and lower back. In this article, I am going to present a useful lesson to improve your leg position.
A solid stable pelvis and lower back is the prerequisite to good leg position. Once the pelvis is stable, it is important to let go of all unnecessary tension in the legs. Excess tension or gripping with the legs adversely influences your ability to communicate with your horse and decreases your stability in the saddle. Once the leg is correctly positioned, you will feel more secure with less effort, your weight can truly be in your heels and you will make an inviting place for your horse’s back to come up underneath your seat.
What is a good leg position?
The most common description of a classical leg position for riding is to have the flat of the thighs on the saddle, the inside of the calves on the horse and the feet pointing forward with weight in the heels. Common analogies are “Draped like a wet dish towels,” “hanging” or legs that are “wrapped around the horse.” My favorite analogy is that the thigh is like a “slab of raw meat” against the saddle – which means that the muscles are not tense or contracted in any way. Your support and connection to the horse is through your skeleton, not your muscles.
The alignment of the calf is largely determined by the angle of the knees and heels. Knees pointing outward will generally cause the heels to turn inward. Contact is towards of the back of the calf. If the heels are parallel to the horse’s sides, the inside of the calves will rest against the horse.
How much of your calf contacts the horse depends on the length of your leg, the stirrup length, and the shape of your horse’s barrel. A long-legged person on a small-barreled horse may only have an inch or two of calf in contact with the horse. A short-legged person in jumping length stirrups may connect with the entire length of her calf. Quality is vastly more important than quantity. If you have to choose, go for good contact with the thigh rather than with your entire calf.
Many riders know or have been told that they want the feet parallel to the horse. Done correctly, this alignment gives the rider tremendous leverage and stability. However, most riders try to achieve this position starting from the feet and ankles, often rolling out onto the pinky toe as they strain to point their feet forward. Rolling to the outside of the feet can put tremendous strain on the knees and ankles. Therefore, it is extremely important not to force the foot into pointing forward. The movement in your hip joint, your conformation, your saddle, and the conformation of your horse determines whether or not your foot will be parallel to the horse.
Finally there is weight in the heels. There is a huge difference between shoving the foot down and flexing the ankle against the stirrup in an attempt to weight the heel and actually weighting the heel. The former straightens and stiffens the knee, pushes the lower leg forward out of position and, ultimately does not achieve the desired goal of weighting the heel. The latter is achieved by lengthening from the hip to the heel when the heel is slightly away from the horse, not by flexing the ankle. The purpose of flexing the ankle is to tone the calf muscles, which makes the rider’s leg firmer and therefore provides a stronger leg aid. A constantly tense calf dulls the horse to the leg.
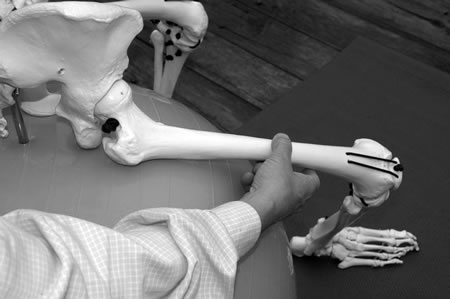
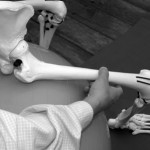
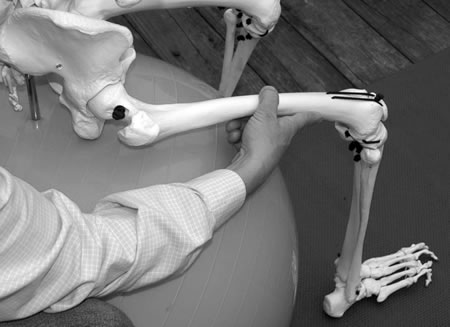
Skeletal anatomy of the leg
There is a total 60 bones in your two legs, with 30 bones per leg. The femur or thighbone is the largest bone in your body. At one end, it forms the ball of the hip joint. While at the other end, it forms your knee joint along with the tibia or shinbone. The kneecap or patella lies in the groove where the femur and tibia meet.
You can feel your tibia by running your hand down the front of your lower leg. The fibula is a much smaller bone running from the outside from the top of tibia to your ankle. The two bumps on either side of the ankle are the ends of tibia and fibula.
The ankle and foot are comprised of 26 bones: 14 bones in the five toes (the big toe only has two), 5 metacarpal bones, 5 bones in the mid foot, talus and calcaneous (heel bone). Tibia and fibula rest on talus (your ankle bone), which sits on calcaneous. Your ankle is the equivalent of a horse’s hock, the point of the hock being calcaneous.
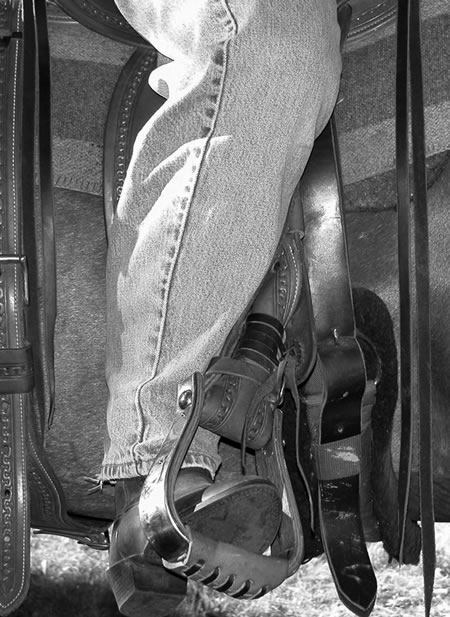
It is beyond the scope of this article to describe the movements of the foot. However, it is important to remember that, for stability, it is best to have the knee aligned over the 2nd toe. This provides a column of support through the foot, ankle, and tibia and femur. As I have stated, rolling to the outside of the foot is unstable for a variety of reasons. Shimming your stirrups can assist in creating the correct alignment especially when the equipment is the cause of the problem as is the case with most western stirrups. (See EH #20.)
1a
1b
1c
2a
2b

2c
3

4
5
6


7a
7b
8
9

10
Knees Out, Forward or In?
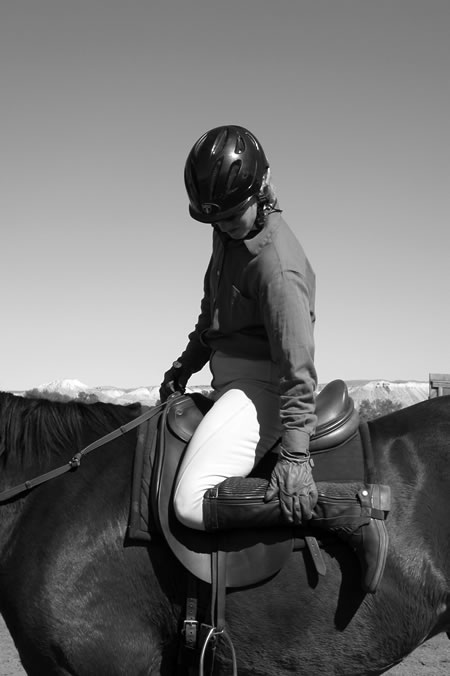
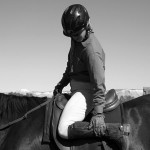
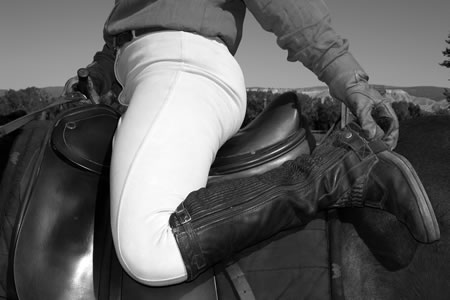
Photo 1 – a & b. Knee position indicates what is happening in the hip. A rider sitting in a frog-legged position has knees and feet turned out with the back of the calf on the horse. This position will restrict movement in the rider’s pelvis and inhibit the horse’s ability to lift his back.
Photo 1c. The knee pointing outward closes the space at the back of the hip joint, which restricts forward movement in the horse and puts pressure into the center of the horse’s back.
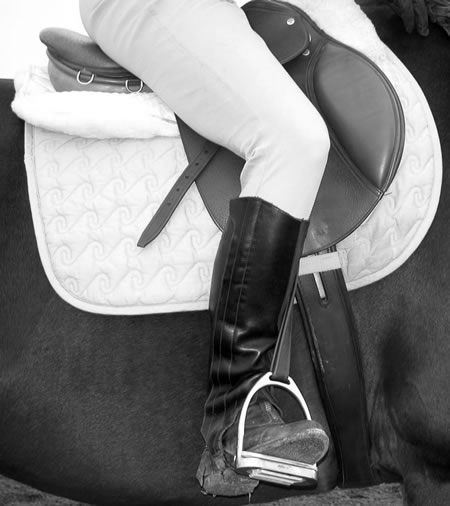
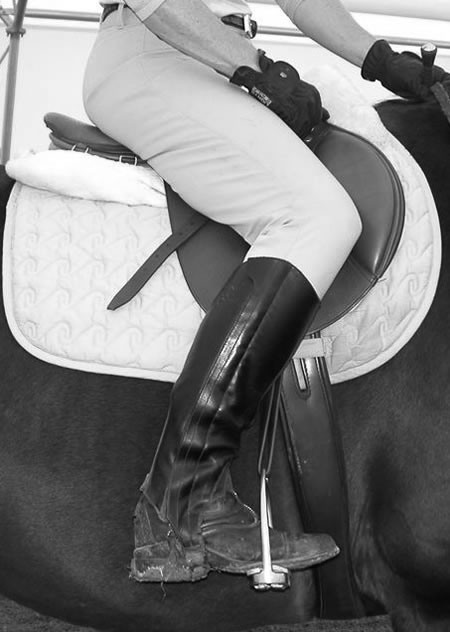
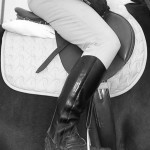
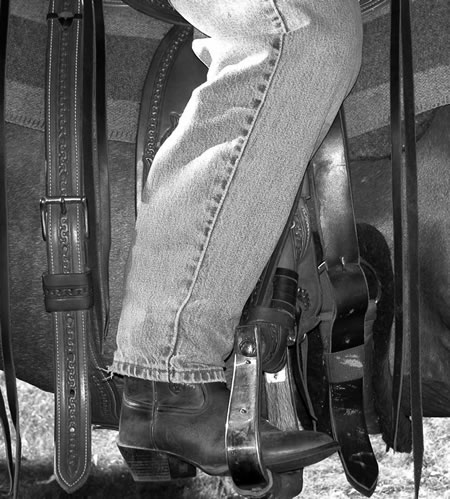
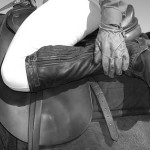
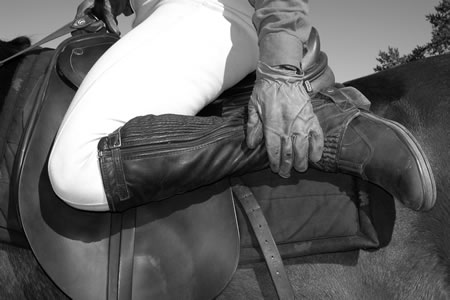
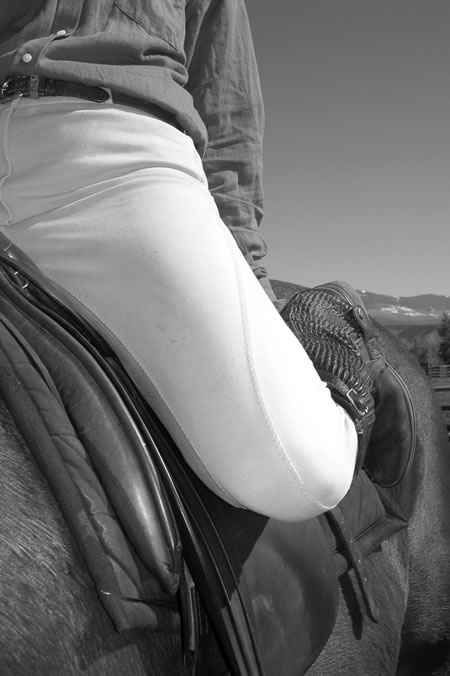
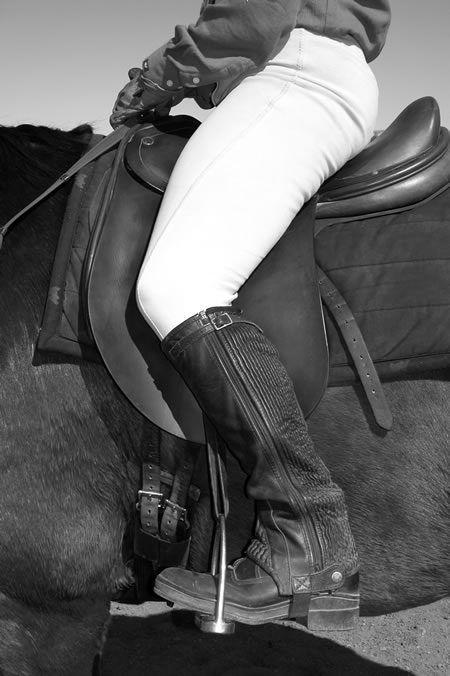
Photo 2 – a & b The knee and foot are pointing forward. The inside of the calf rests on the horse with the heel parallel to his body. This widens the distance between the femur and the seat bone, making room for the horse’s back and allowing forward motion.
Photo 2c. When the flat of the thigh is against the horse the distance between the greater trochanter and the seat bone is as wide as possible. The rider’s weight is distributed over a large surface area, including the rib cage. The leg is aligned with the knee over the second toe, reducing any stress on the knee.
If the rider is pinching with the knees, the heels can get too wide. This will roll the calf towards the front of the shin and close the space at the front of the hip. Again this will restrict the horse’s movement.
A Do-it-yourself way to a good leg position
Swing your lower leg
Begin by taking one foot out of the stirrup and gently swinging your lower leg while standing still. Walk on a long rein and allow the movement of the horse to swing your leg. Notice if it swings more forward than back or more back than forward from the starting point. Does your heel turn inward towards the horse as it swings?
Stop. Swing your leg back to see how far it swings now. What prevents your lower leg from going further? Observe what happens to your heel as you swing your leg. If your heel is going inward, towards your horse’s barrel, the swing will be limited. Turn your heel slightly outward away from the horse as you swing your leg back and up. Notice that you can swing the leg further. Go gently because you may cause a cramp in your hip if you aren’t careful. Repeat this process at the walk.
Now see how high you can swing the leg back and up. Where can you reduce the effort? How can you make it easier? Do you rock forward on your pelvis to swing the leg, or can you swing it up without lifting your seat off the saddle?
If you are leaning forward to swing your leg back and up then you are not going to get the full benefit from the lesson. Keep your buttocks softly in the saddle when you swing. If this is hard to do, or the swing decreases, spend more time sorting this out before you go further. Don’t worry about how much you can swing. Make the swing you can do really good quality.
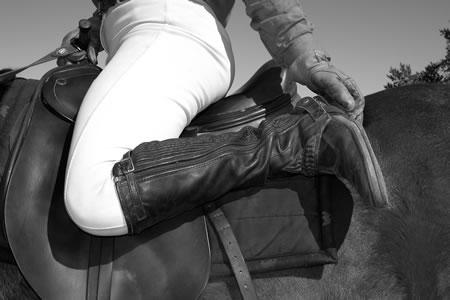
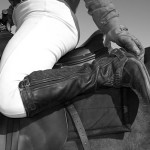
Roll your calf like a rolling pin
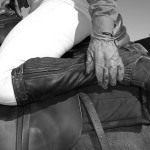
Photo 3. Swing your leg again and see if you can catch it with your hand. Lean over a little and let your rib cage side bend. Look down at your leg as you swing it up, does that make it easier? Make sure you aren’t tilting or you might wind up on the ground. Catch and release your lower leg several times. If it doesn’t drop freely, then you are gripping somewhere. Let go so that you are holding your leg with your hand, not the muscles in the leg. Do this at a walk for a few minutes.
Photo 4. Now keeping your thumb with your fingers like a paw begin to roll your calf up and down. It is a small but definite movement visible at the top of your calf. Let the leg drop and swing again for a minute. Then repeat. Do this until you can clearly observe an upward and downward roll of the calf. Notice how your heel moves as the calf rolls up and down. Let the leg go and ride forward at the walk. Can you swing, catch and roll your calf at the walk?
Circle your foot
Photo 5. Catch your calf again. Holding your calf (or ankle if that is more comfortable) make a circle with the front of your foot. Go slowly and make sure it is a round circle. If you can’t do a round circle, then start with four points; in, out, towards the horse’s head, and towards the horse’s tail. Then see if you can turn the four points into a circle. Rest for a moment and repeat.
Reverse the circle. Is it easier? As you make the circles with the front of your foot, what is happening at the top of your calf? Notice that the movement relates to what happened when you rolled the calf. Go for a walk.
Swing, catch, roll your calf, and circle your foot clockwise and counterclockwise while the horse is walking. Where do you have to let go of tension to allow all this to happen?
Photo 6. Catch your leg. Take hold of your heel. Can you move your heel at all? See if you can move the heel in, out, forward and back. What has to happen with the knee in order for the heel to move forward and back? It might help if someone were to place her hand under the toe of your boot to give you a sense of the ground when moving the heel.
You could also hold the heel and make clockwise and counter-clockwise circles, or have someone help you by gently moving your heel for you. Repeat at the walk.
Pump handle
Photo 7 a,b. Catch your leg, but this time have the palm of your hand facing away from you, so that you are holding the calf from the side closest to the horse. Gently take the ankle away from the horse like a pump handle. Do not go very far. This is asking your hip to widen at the back. Notice that your knee goes closer to the saddle as the ankle moves out. Do this movement slowly several times. Rest. Then repeat at the walk.
Photo 8. Catch your calf with your hand on the inside again. Next see if you can take your knee away from the saddle, allowing your ankle to get closer to the horse by making many small movements. Next, alternate between taking your ankle away from the horse, returning to the start position and then taking your knee away. Do not try to go from one to the other without returning to the start position. Rest. Repeat in walking.
A Few Words of Caution
- Take your time with this lesson and spread it over several days, weeks, or months, rather than trying to do it all at once. There are many small steps for sticky hips that I cannot write here. If you do too much you could hurt yourself. It is better to do a little at a time and feel what happens between rides. Really listen to your body to avoid and pain and injuries.
- Modify the lesson if it is difficult for you to do. Do not strain. Start off the horse on a stool, bench or mounting box, so that you can easily reach your lower leg without holding your breath. If anything is uncomfortable, stop, do less, and go more slowly. Take your time. Be patient with yourself.
- Do not do this lesson on a young or overly sensitive horse. If you make a mistake, he will think that you are intentionally kicking him and may have a very strong response to your unintentional leg aids. Watch out for mares with sensitive flanks. They may strongly object to your leg coming back too far, especially if you are tight in the hips.
- Having a ground person for this lesson can be a good idea. While learning, a ground person can swing your leg up and support it as long as she is gentle, observant, and stops when you tell her. Choose your help wisely; someone who is observant with good feeling is a plus. More harm than good can come from an over-exuberant ground person who wants your leg to go all the way up on the first go.
- If the horse or the twist of the saddle is too wide, or you are in a treeless saddle, you may find this lesson very difficult. The cause is too much thickness between your hips and/or not enough support for your pelvis, thereby restricting your hips. Find out if you can do the lesson off the horse. Then try the following experiment mounted: Sit off to one side of the saddle as much as an inch or two. See if you can swing your leg up. Then sit in the middle of the saddle and try again. If it is easy sitting to the side, then the problem may be the saddle or the width of your horse. A temporary solution is to sit to one side, work with that leg, and then sit to the opposite side to do the other leg. Unfortunately, you may not be able to get both legs in a good position at the same time. In the end, you may need to find a comfortable saddle that fits both you and your horse so that you can move freely.
Pressing into the heel from the hip
Photo 9. Swing your leg up and take hold of your heel again. Without flexing the ankle, press the heel back into your hand. Notice that in order to do this you have to press from your hip. Turn your heel slightly in and out pressing each time. Find the alignment that makes it the easiest to press your heel back. If you are holding your breath, you are trying too hard.
Drop your leg and let it hang for a moment. Then gently take your heel slightly away from the horse and press into the heel from the hip again. Remember to leave the ankle relaxed. When you press from the hip with a relaxed knee and ankle, the heel will move back and down, weighting your heel from your hip. Make sure the knee stays slightly bent; otherwise when you press, the lower leg will move forward instead of back.
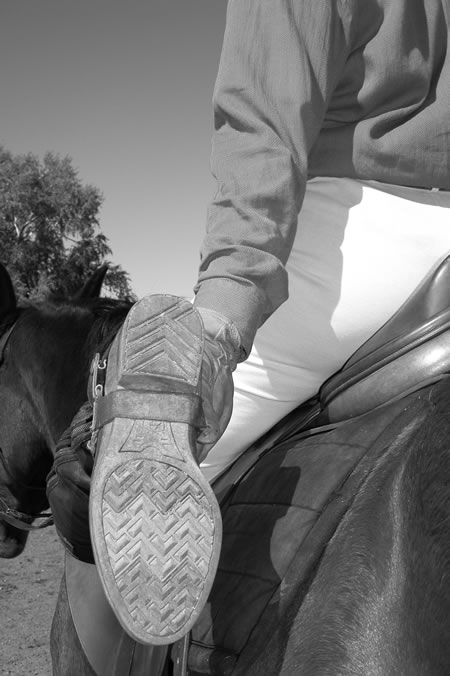
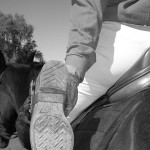
Photo 10. Put your foot into the stirrup. Experiment with the position of the heel in and out, each time gently pressing from the hip into the heel. Find the alignment where the heel can deepen without tension in the ankle or knee. Now you have weight in your heels!
Once you have experienced the feeling of a long leg with weight in your heel you will want to ride like this all the time. Use this lesson as a 5-minute warm-up to lengthen your legs and get your weight in your heels at the start of each ride. Not only will you be more secure and comfortable with your new legs, but your horse will appreciate that you aren’t squeezing his rib cage anymore.
This article originally appeared in Eclectic Horseman Issue No.38