Written by Sue Stuska Ed.D.
Whether you’re moving your horse into a new boarding situation, or you’ve purchased a new horse to add to the existing herd, an understanding of herd dynamics and suggestions for easing the transition are useful. We’re assuming that your goal is to have two or more horses live harmoniously in a group situation. The goal is to make the introduction as safe as possible. In the process, we’ll get to watch and learn about a lot of fascinating and subtle (to us!) horse interactions.
Be prepared to take the time necessary to achieve a harmonious relationship. How the horses interact will show you when it’s OK to move on to the next step, or to call it done. Let their actions and reactions be your guide. This may take days or even weeks.
Introducing a new horse to a single resident is similar to introducing one horse to a herd of two of more. Your existing herd already has its pecking order established. Even if it’s only a herd of two, one will be mostly dominant and the other will mostly give way. While “submissive” is the opposite of dominant, in horse herds there are a myriad of steps between the two and the relationship is not absolutely vertically linear. In other words, one horse may be seen as the dominant one, but in reality both horses exhibit both dominant and submissive behaviors in daily interactions.
The incoming horse is at a disadvantage. He would be in the wild, too. He is coming into anther horse’s territory, neither horse knows the other, and the new one doesn’t know the area. The new horse may have been higher in the pecking order in his or her old band than he will be in the new one. He may have been “top dog” in his previous situation but the resident usually has the edge. In the wild, horses don’t defend territories but instead have home ranges over which they roam to meet their forage, water and shelter needs. A new wild horse coming into the area can do so gradually, testing the welcome or lack thereof, and can run away if and when necessary. In captivity, we set the limits of the area with fences and buildings. In the wild, an intruder can be seriously hurt if he doesn’t interact well; the same is true on our farm. It is up to us to set up the situation for a minimally confrontational, and a safe transition.
Every farm has the potential for a safe transition; you know your property best. You may have to make some alterations temporarily. Borrow some fence (round pen) panels, or change the setup of your own for the time. Be aware of where confrontations may take place and act ahead of time to make the outcome safe for all the horses and for yourself. You don’t need to get run over by a loose horse while your horse is trying to save his hide, nor do you want the horses to get hurt while sparring across a fence.
Health Criteria
Before the new horse has access to the area, he should be dewormed. Ideally, he should be dewormed long enough before the move that any parasites dropped after the treatment are dropped on the old property (and the manure cleaned up!) so as not to bring any more parasites than necessary to the new land.
Quarantine in a neutral space for three weeks is ideal to see that the new guy isn’t carrying any contagious diseases, which he will show by coming down with the symptoms. This length of time is not always practical, but is desirable. If you know where the horse came from and know that the horses there are healthy, that’s helpful. Any time horses come and go (for example, to a clinic), they have the chance of catching some ailment like the flu (influenza) or a runny nose (possibly rhinopneumonitis). Rhino is minor in adults, but can cause pregnant mares who get it to abort their foals. Time will hopefully show the disease; incubation periods, for flu and rhino at least, are a week or less.
If you have to quarantine a new horse on your farm, choose a place where there is no physical contact, no contact with respiratory secretions, and no contact with nasal spray. The horses should not share feeders, water troughs, or turnout areas. Skin ailments like ringworm and lice can be transmitted by physical contact and by our grooming tools and tack; give the new guy his own brushes, cinch, breastplate, bridle and saddle pad.
A couple weeks before the move, the transferring horse should have blood drawn for a Coggins test (for Equine Infectious Anemia antibodies). A recent (within 6 – 12 months) negative Coggins test is required on a state-by-state basis for transport (particularly across state lines) and for changes in ownership. It is wise to require it for horses coming onto your property; this protects the residents. EIA has no vaccine or cure and a horse with the virus might not appear sick but may still transmit the virus via bloodsucking flies. During this vet visit, have the vet do a routine health check, which may turn up any latent disease and also provide some peace of mind for the destination property horse owners.
Introductions
Once the new horse’s health is apparent, begin his introduction to the resident. It is ideal if the new horse can first be kept separate where each can see and smell each other but no physical contact is possible. Assuming both respect fencing and neither is extremely aggressive, the type of enclosure is not as important now as it is later.
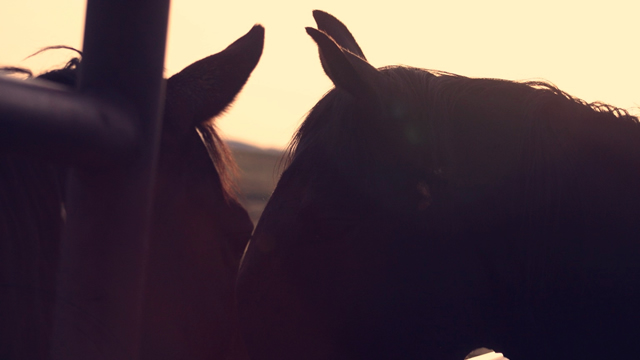
The body language of each horse will tell you how well this (and each) phase is going and when you can progress to the next step. We know the signs of dominance and aggression: ears pinned, back turned, tail swishing, arching the neck and shaking the mane… Submissive signs include retreat, plus lowering the head, yawning (sometimes), and teeth clapping (seen most frequently in young horses and also with mares in the presence of stallions—the lips are drawn open and the teeth close repeatedly). The key to knowing what is going on is watching both horses at once and catching their non-verbal conversation. Signs that you should not progress to the next step include a newcomer who won’t show submissive signs but keeps acting aggressive. (It is possible that the horse will capitulate once he loses the security of the fence—or not. It’s up to you to judge.) Dominance does not always mean the horse is aggressive. The reason horse society works and that competing wild stallions live to breed mares in their respective harems is that the horses reach an understanding of each other’s strength and figure out when to be aggressive, when to defend, and when to back off.
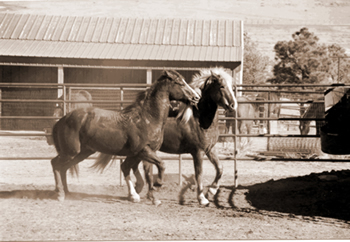
You don’t, of course, have to be this careful. The first step could be to just turn out both horses in a fenced area like a pasture or arena and step back. This may go well, or it may not—most of us have seen both situations. The worst possible scenario is that the newcomer gets pinned in the corner and kicked/bitten badly—and we all know how brittle those bones can be and how quickly major injuries can happen.
Physical Contact
The next step is to allow physical contact in a situation you set up. Both horses should have enough space to get away from the other. Neither should feel he has to defend his feed or water. Depending on the temperaments of the horses and your facilities, this can be done in two adjoining stalls or in a round pen set up in a pasture or arena (the newcomer gets the round pen).
The fence or wall in this case must be safe. If solid, it must withstand kicks without injuring the kicker or damaging the structure (wood that is strong enough not to break but has some flex is ideal). If not solid, like a round pen fence, it must still be strong, and it must be smooth to prevent injury when horses reach or spar through or over it.
Plan ahead about the access—if you are using a round pen in the middle of the turnout area, take the newcomer out to the pen first and then turn the resident out. You don’t want to risk a confrontation by trying to lead a new horse through an area where the resident is running free.
Turn Out Individually
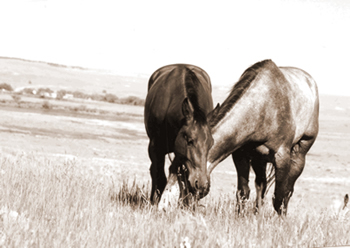
If you are dealing with one newcomer and one resident, the next step is to turn the horses out individually. This gives the newcomer the advantage of knowing the area. It will hopefully prevent him from being pinned in a corner or run through/into a fence. An alternative, leading him around the empty area, is not as effective and may not be enough to get him familiar with the boundaries and any internal obstacles like ditches and tree thickets. He needs to find the existing paths so he can cross over or pass around obstacles easily and in a surefooted manner. Try doing this over a few days by turning the newcomer out in the area alone, alternating with the resident. This has the added advantage of the resident getting used to the smells of the newcomer on his turf.
Turn Out With the Least Dominant Resident
If you are dealing with more than one resident, your observations will tell you which of them is lowest on the hierarchy. After doing the single turnout, above, turn this horse out with the newcomer. The lowest resident on the hierarchy will be least likely to beat up on the newcomer—although you may be surprised how much he now asserts himself. Once these two have bonded, they may look out for each other in the herd—giving each an advantage. The most careful way to proceed, if you are dealing with enough horses, is to then add the 2nd highest resident and let the three work out their relationship. Add the others in order as it seems prudent. (The alternative, turning out the newcomer with the whole herd, might result in a huge chase when the most dominant resident follows to investigate and the others get excited and come along.)
If the setup involves small pocket areas like run-in shelters or stalls, you may need to close these to access until the horses have worked out their differences. You may even need to reconstruct—by opening another exit—if you are adding a second horse to a facility built for one. Even if the newcomer knows he must clear out and let the resident have the shelter, he may be unable to get out in time and get hurt if there is only one narrow entrance/exit.
Choose your turnout area based on the safest available place at your farm. You’ll want to choose a large enough area that the horses can run around but not so large that you can’t see the whole area or can’t get to part of it in a short time. Too small a space invites trouble when one horse can’t get away from the other. Fencing is also a consideration—it must be visible to running horses with their minds on each other and ideally without blind alleys or corners near the barn where one horse might get cornered.
With all your preparation, you will have a pretty good idea of how the initial turnout is going to go. Be prepared, however, to catch the horses if they continue to run or if one won’t stop chasing the other. This is a chancy proposition, but you will be safest if you have a friend (or the other horse’s owner) along with you and have a plan. Catch the aggressor or instigator first. Do be prepared for both horses to get hot and sweaty (take the weather into account—is it a very warm day, or will the temperature plunge in a few hours at dark?). While in some cases feed causes strife, in others putting out several piles of hay before turning them loose might get them settled down to eating while they keep an eye on each other (and before they get too worked up).
Feeding Time
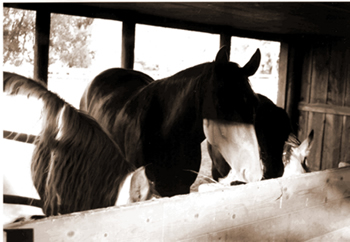
When you feed your new herd together, be sure the newcomer has a bucket or hay area well away from the others and watch to be sure he gets his share. There is always the possibility that you will have to separate horses at feeding—regardless of whether they just met or have lived together for years. This just depends on their personalities and nutritional needs. Feed the residents where they are used to being fed and choose another area for the newcomer.
If the resident is used to coming and going freely from his stall or shelter to the turnout area and is fed inside, plan ahead to prevent the newcomer from inadvertently being caught inside and pinned to the wall at feeding. Make a separate area to feed the newcomer. Catch and close the resident in the stall for feeding and feed the newcomer elsewhere. Very soon, the newcomer will go to his separate place at feeding time and avoid the close quarters.
Personalities
Orchestrating the introductions will give you new insights into the personalities of both the resident and newcomer horse and allow you to hone your viewing skills as you watch for the subtle communications that allow horses to coexist in a herd.
This article originally appeared in Eclectic Horseman Issue No.12