
This article originally appeared in Eclectic Horseman Issue No.27
Written by Wendy Murdoch
Many riders struggle to apply their weight aids correctly. While your dressage instructor may clearly tell you where to have your weight for a variety of movements including canter departs, shoulder-in, haunches-in and half-pass, your attempts may not yield the results that you are looking for. The answer to this problem may be caused by several factors:
1. You are not sitting straight to begin with.
2. The timing of your weight aids is out of sync with the horse.
3. You are overdoing the application of your weight aids causing adverse effects.
4. You are not putting your weight where it is actually going.
5. You have no idea how to apply a weight aid in the first place.
While I could go into a long discussion about the whys and wherefores, I would rather give you one exercise you can do to help you apply weight aids more correctly. This exercise, commonly referred to as the “Pelvic Clock,” is an adaptation of a Feldenkrais Method® Awareness Through Movement® Lesson. In its basic form this lesson gives you more mobility in your pelvis. Greater mobility in all directions allows you to find a balanced central position. From here you will be able to make small, accurate movements in your pelvis in order to apply accurate weight aids.
As a teaching tool, the Pelvic Clock can be used to help the rider find a more balanced seat once she has done this lesson off the horse. If the rider is sitting too much to one side while she is riding, I can help her sit balanced in the saddle by asking her to move her pelvis toward a particular hour on the clock that will counter this position, resulting in a more level, balanced seat. In this way I can coach the rider into a central position and from there toward subtle weight shifts so that her aids are more effective.
Feldenkrais Method®
The Feldenkrais Method is named after its originator, Dr. Moshe Feldenkrais, D.Sc. (1904-1984), a Russian born physicist, judo expert, mechanical engineer and educator. The Feldenkrais Method is based on
principles of physics, biomechanics and an empirical understanding of learning and human development. By expanding the self-image through movement sequences that bring attention to the parts of the self that are out of awareness, the Method enables you to include more of yourself in your functioning movements. Students become more aware of their habitual neuromuscular patterns and rigidities and expand options for new ways of moving. By increasing sensitivity, the Feldenkrais Method assists you to live your life more fully, efficiently and comfortably.
There are an increasing number of Feldenkrais Practitioners that work with dressage riders. To learn more about the Feldenkrais Method or to find a Feldenkrais Practitioner in your area, go to www.Feldenkrais.com.
What you will need to do this lesson
For this lesson you will want to sit on a flat, level surface. The best height is such that you have a 90-degree angle between your knee and thigh. If you are sitting on a standard chair, you will need to come to the front edge of the chair. Your feet need to be flat on the floor. If you can, take your shoes off. For the rest periods it would be good if you could lean against the back of the chair or a wall if you are sitting on a bench. Alternatively, you could lie on the floor during the rest periods.
Pelvic Clock
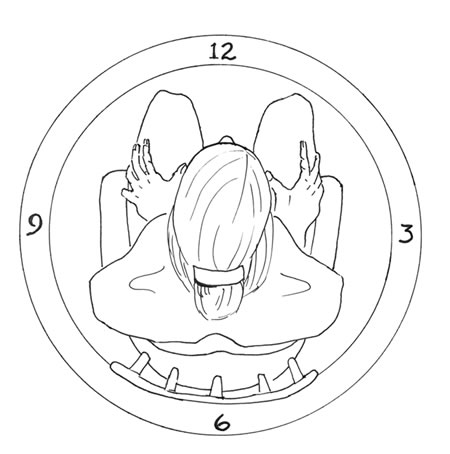
Photo 1
Ill. 1
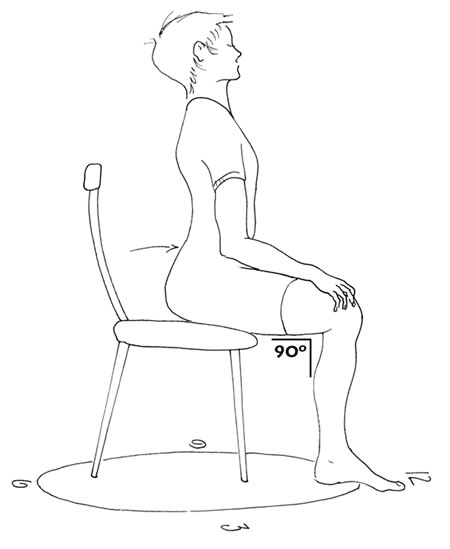
Photo 2
Ill. 2
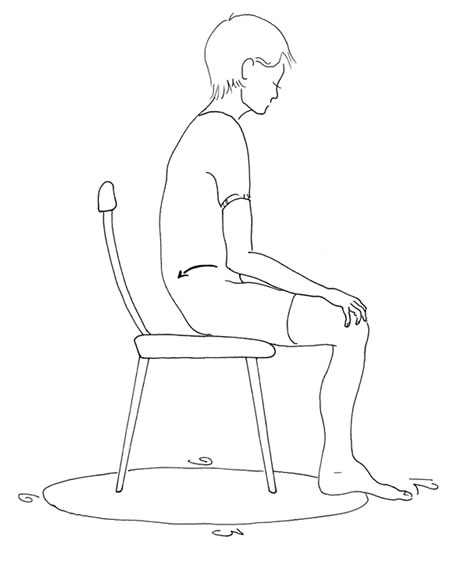
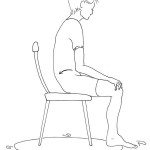
Photo 3
Ill. 3
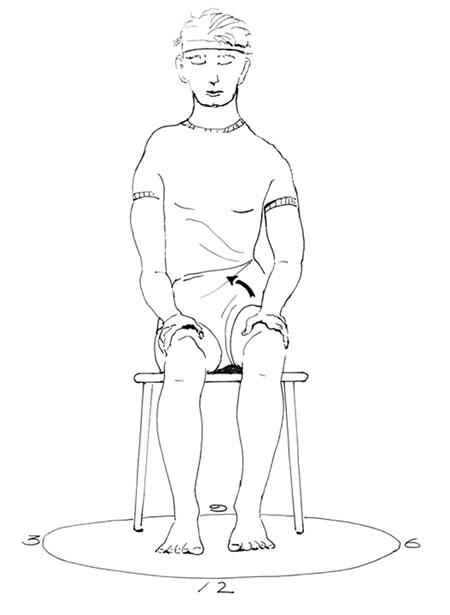
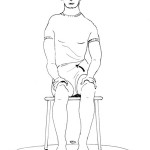
Photo 4
Ill. 4
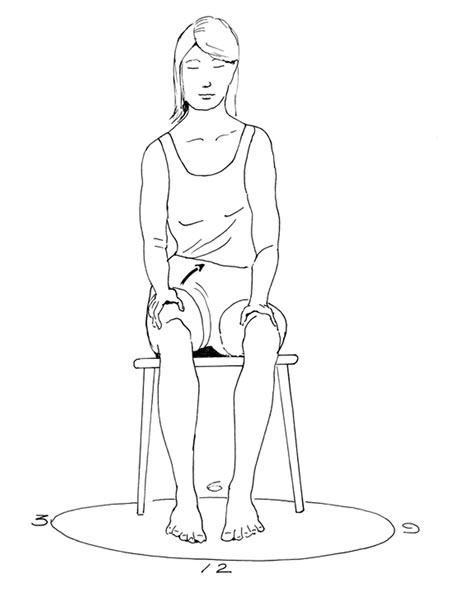
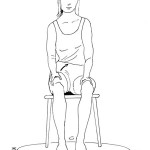
Photo 5
Ill. 5
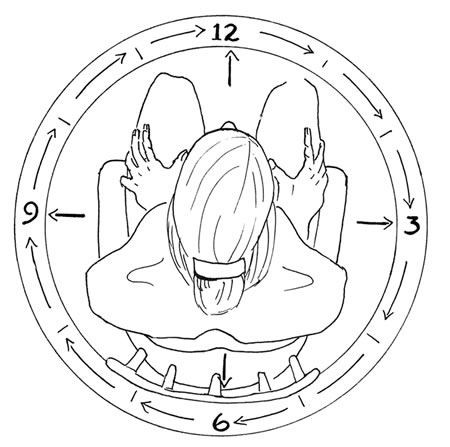
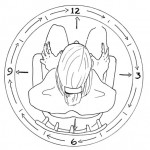
Photo 6
Ill. 6
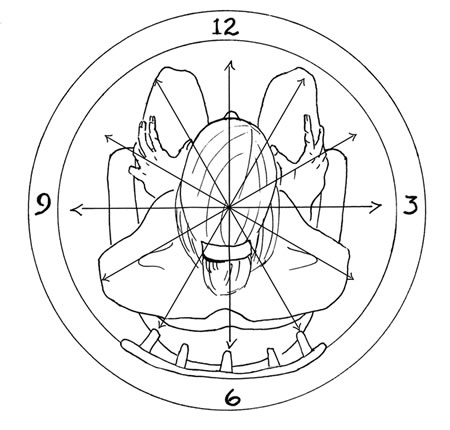
Photo 7
Ill. 7
To begin, come to a sitting position at the front of your chair with your feet flat on the floor. Close your eyes and feel your seat bones in contact with the chair. Notice if your two seat bones are making equal contact or if one is heavier than the other. Also notice if you are sitting on the same part of each seat bone.
Now imagine that you are sitting on the face of a clock (Illustration 1). The clock is on the surface you are sitting upon or on the floor below you. The hour of six o’clock is behind you and 12 is in front of you. 3 o’clock is to your right and 9 o’clock is to your left. (Digital clocks won’t work here!)
Slowly begin to move your pelvis so that you advance the top of your pelvis toward 12 o’clock (Illustration 2). This means that you would hollow your back slightly as you move the top of your pelvis forward. Do this small movement many times. Notice what happens to your weight on your seat bones as you do this. Notice what happens to your breathing, your hip joints and your spine. Rest.
Come to sitting again. This time move the top of your pelvis back toward 6 o’clock (Illustration 3). That means your back will round slightly. Notice what other parts of you move as you take your pelvis towards 6. Do your feet tend to want to leave the floor? Do this movement many times to feel what happens with your chest, head and feet. Rest.
Come to sitting again. Tip your pelvis toward 3 o’clock (to the right) either by lifting the left seat bone or pushing down slightly with the right seat bone. Repeat this movement several times. Do your heels want to lift off the floor? Go slowly. How do you move your pelvis toward 3? Which leg/foot helps you move toward 3? What does your back do as you go toward 3 o’clock? Do you tilt, lean or collapse your rib cage as you move over toward 3? Rest.
Repeat only now go toward 9 o’clock (Illustration 5). Do you go toward 9 differently than 3? Which direction is easier? Rest.
Come to sitting again. Move your pelvis toward 12 o’clock. Then continue around the outside of the clock toward 1 o’clock. Continue on to 2 then 3, back to 2, 1 and 12. Repeat this quarter of the clock several times. Notice which hours are easy and which hours are not so easy. What is the quality of the arc like as you go from 12 to 3 and back? Is it jerky, smooth, flat or curved? Rest for a moment. Then continue moving from 12 through 3 to 6 o’clock. After you have done this half of the clock many times slowly and easily, sit again in the middle. Notice the difference between the two sides of your pelvis. Rest.
Come to sitting again and repeat moving around the clock, this time going from 12 through 9 to 6. In other words, you are doing the other half of the clock moving counterclockwise, then from 6 clockwise back to 12. Repeat this many times, slowly and easily. Notice which hours are difficult to find and which ones are easy. Feel the difference in the two sides of your pelvis. How much of you is involved with this movement? Rest.
Come to sitting and move hour by hour around the outside of the clock in a clockwise direction. (Illustration 6). How smooth can you make the circle? What happens in your hip joints, rib cage and head? Then go counterclockwise around the clock. How is this different? Rest.
Come to sitting and now instead of going around the clock begin to go across the clock. Start with moving from 6 to 12. Notice if this is easier now. Next move between 3 and 9. This will also be familiar as you have already done this diameter of the clock. Then beginning with 1 o’clock go through the hours diagonally (Illustration 7) 1 to 7, 2 to 8, 3 to 9, 4 to 10, 5 to 11 and 6 to 12. Which diagonals were easy? Which diagonals are hard? Rest.
Finally come to sitting again. This time go around the clock and then across the clock. As you do this, see if you can determine the exact middle of the clock, where the hands would attach at the center. This would be a balanced central position on the saddle. Notice if what you now consider the middle is in a different place on your seat bones than when you started.
If you adhered to the basic guideines for the lesson, you may have noticed that it got easier as you went along. You may also have discovered why in your riding, you have only been able to do something in one direction but not the other. If there were hours that were really easy, you might find that you get trapped there when riding preventing you from sitting evenly. If there were hours on the clock that were elusive or nonexistent, you may not have been able to shift your weight effectively in certain directions. Once you have learned how to do the Pelvic Clock on a chair, you can take this experience to the saddle and repeat the lesson. Make the clock much smaller when in the saddle (at the walk on a quiet horse) and notice what happens to your horse’s balance when you move toward the different hours. At first you may find that you have similar difficulties with a particular area on the clock. Or you might find that in the saddle the “sticky” spots have shifted to a different hour. See if you can determine when the clock is even and level in the saddle. Then when you want to make a weight shift, think of making a barely perceptible movement toward the hour you need for the desired placement of your weight.
Remember that good eiding requires accurate riding. Grossly overemphasized weight aids will only cause the horse to tense and stiffen in order to counterbalance underneath you. The more aware you are of where the middle is, the more accurate your weight aids will be.
Basic guidelines for doing Feldenkrais Awareness Through Movement lessons
The purpose of this or any Feldenkrais Method lesson is to help you develop awareness through movement. In other words, it is about bringing your conscious attention to how you move and what is happening in your entire self as you do the lessons. Therefore, in doing this lesson it is very important to observe the following guidelines.
• If it hurts, do less. If you experience any pain while attempting to do the suggested movements, make your movements smaller. Forcing will only show you your limitations rather than your potential. If you think you are already making small movements, see if you can make them half that size. Challenge yourself to do just the hint of the movement. Dressage requires minute adjustments to position within the movement of the horse. If your movements are abrupt, rough and harsh, it could interrupt the horse rather than harmonize with him. Making small movements requires the fine motor control necessary to be a good dressage rider.
• If you get tired during the lesson, stop and rest. There are many pauses in the lesson. The idea is to give your nervous system a chance to process the information you are discovering. If you don’t stop and rest when you are tired and/or at the prescribed rest stops, you will not allow your brain to integrate new information. Unlike a computer, our brain learns when it is resting or thinking about other things. This goes along with the concept of “sleeping on it” to figure something out. The rests are momentary pauses to give your nervous system a chance to process the information.
• While you may find some of the movements similar, Feldenkrais lessons are unlike aerobics, yoga or any other type of physical exercise. The lessons are designed to help you understand how to organize yourself easily and efficiently. Hopefully you will discover areas of yourself that have been inactivate or tight, preventing you from moving in a certain way. You would then be able to apply this new awareness to your riding or any other activities you do such as yoga or Pilates. In other words, the Feldenkrais lessons will allow you to access a greater potential for movement in all that you do.
• Do not force the movements. Often we are told “no pain, no gain.” With Feldenkrais Method lessons the opposite is true. Forcing, trying hard, making big fast movements will only inhibit the learning you will gain from the lesson. This in itself can be hard for many people to grasp. If you find yourself struggling at your maximum range of motion, then consider doing 10% of what you think you can do.
• Visualize the movements instead of actually doing them. If you find that even the smallest movements are painful, or that you are unable to do certain movements, simply visualize them. Why does visualization work? You cannot think a thought without a movement. Therefore, by visualizing you will be making imperceptible movements. When you return to doing the movement, you might be surprised to find that is much easier it is.
• You can’t make a mistake. Dressage riders often are so concerned with “getting it right” that they will sacrifice everything to be “right.” In this lesson there are no “wrong” movements. The important thing is to observe what you do so that you have a choice. Later, you can apply the lesson to finding a balanced position in the saddle. However, if you keep thinking about how this applies to riding while doing the lesson, you will miss some important information about yourself. Do not inhibit certain movements because you can’t see how it might apply to your riding at the moment. Experiment with different possibilities. Afterward, you can decide which movements you choose to use while riding.
• Take the time to explore the movements. Going slowly is important so that you can observe the changes that occur. If you think you are already going slow, try going half again as slow. The small movements required for dressage require fine motor control. By going slowly in the lesson, you will discover how to make minute changes in position.
[ux_custom_products cat=”magazine-subscriptions” products=”6″ columns=”3″ title=”Want more? Subscribe!”]