Written by Wendy Murdoch
Previously I have discussed a simplified model of looking at the rider’s and the horse’s skeleton using the analogy of a bowling ball (the head), a flexible straw (the spine), a bowl (the pelvis) and one or two pairs of stilts (human or horse, respectively). In Eclectic Horseman Issue No.14 I presented the concept of a counterbalance using a seesaw image to illustrate how the horse can carry its head easily.
It is readily apparent in humans that if we align our skeleton vertically, our bones in a standing position support our head. This is not so apparent in the horse, since the horse stands horizontally. Therefore, in order to efficiently carry his head, the horse has to use his skeleton in such a way as to counterbalance the head with the pelvis, which is about six feet away.
In EH #14 I presented several seesaw models as examples of how horses can be ridden. Each way affected their ability to carry their head. The easiest way is when the hindquarters lower in order to raise the front end up.
Ultimately, the overall quality of movement is governed by the ease with which the head is carried. Since gravity is acting on us at all times, our ease becomes a function of how well we can move in gravity. Freedom of movement is determined by how little effort is required to carry our head.
If our skeleton is aligned in a manner that makes carrying the head easy, then we (both horse and human) have more time, energy and ability to focus our attention on other things (i.e., jumping over a large obstacle, canter pirouettes or chasing a cow). If we are constantly struggling to balance our head, we are less available or capable to move when and where we like because we must first deal with the issue of balancing the head. Therefore, harmony, grace and beauty are lost because both horse and human are struggling with the basic issue of survival—not letting their head hit the ground.
In all of these discussions I am making the assumption that you want to find a way for you and your horse to carry your heads easily, although you might not think of it in these terms. That is a pretty big assumption on my part. However, while you might not think of it as “ease in carrying your head,” you probably express these ideals in terms such as riding in: “lightness,” “freedom,” “harmony,” “partnership,” etc., with your horse. The ultimate state of freedom in riding is called “self-carriage.”
In Dressage Terms Defined by Eleanor Russel and Sandra Pearson-Adams, “self-carriage” is defined as “the ability of the horse to accept full weight-bearing responsibility through the hindquarters for himself and the rider. The horse maintains his posture without any support or restriction from the rider.” In order to do this, the horse must use his skeleton to support his own weight and that of the rider. Otherwise the muscles will be overloaded with the job of weight-bearing, and the joints would be under tremendous stress. Ultimately this will result in breakdown and injuries, not to mention the mental and emotional stress in both the horse and the rider.
To better understand overloading, think of a tent with aluminum poles trying to hold up 4’ of snow. The canvas will tear if it is weak (muscle injuries), the aluminum poles (bones,) are going to fail, the ropes supporting the poles will be pulled out of the ground (tendons and ligaments) under the weight of the snow causing the whole thing to collapse. The poles will give at the joints first, since they are points of weakness, which are unable to bear weight. But on an angled roof with a wood frame and adequate struts, this amount of snow can easily be supported. Therefore, the strength and
alignment of the structure (skeleton) is critical to its ability to support the load (the horse’s own body weight and that of the rider) in movement.
So let’s look more specifically at what needs to happen in order for the horse to be in self–carriage. I am going to break it down into 9 specific points. The order in which each of these occurs will depend on the individual horse and how it is being trained. Also keep in mind that conformation, injury, pain, saddle fit, rider position,
temperament, etc., will play a part in whether or not your horse is capable of doing all of these things.
Bear in mind I am talking about the ideal in this discussion. Often reality if far from ideal! However, it is important for you to have some idea of what needs to happen for the horse to be in self-carriage if you are ever going to get there. I am not going to discuss how to achieve self-carriage right now. I just want to get you thinking about what is happening underneath your horse’s skin for self-carriage to occur.
1. Topline and underline lengthened.
Typically, the topline is referred to as the distance from the poll to the tail. For the purposes of this discussion I am going to limit it to the area from the withers to the croup and the elbow to the stifle. I will discuss the other areas separately.
We have mentioned this previously in talking about the board of the seesaw. The topline and underline of the horse need to be lengthened. If the topline is contracted (shortened), the back is down rather than up. A back that is down is incapable of bearing very much weight. Therefore, the weight of the rider is going to be transmitted to the horse’s front legs rather than the hindquarters. Some of you might remember the example of getting on all fours and having someone press down on each side of your spine at the level of the shoulder blades when you have your back “up” vs. “down.”
You might recall that when your back was down you were on your forehand and were very uncomfortable in your arms, wrists and hands. If the topline is too round (again remember the seesaw example), it will also be difficult for the horse to lift the front end up.
2. Pelvis under.
The lumbar region of the horse’s back is capable of flexing and extending (remember it had virtually no ability to rotate). Therefore, the position of the horse’s lower back will affect his ability to engage his pelvis. Engaging the hindquarters means flexing the lower back and bringing the pelvis under, forward and up. In other words, a pelvic tilt. The lowering of the croup or tilting on the pelvis is extremely important in order to create vertical lift (again remember the seesaw) lightening the front end with the counterbalance of the pelvis (recall the definition of self-carriage is “to accept full weight-bearing responsibility through the hindquarters.” If the horse does not bring his pelvis under, he will have to use extension of the back (arching or hollowing) to lift the shoulders and front end. If the pelvis is tipped up and out, the horse’s hind legs will trail out behind. Remember the example of standing up and changing the angle of your pelvis? If you tip your pelvis forward and down, you cannot lift you leg very high. It is impossible to efficiently lift a load with your pelvis out behind you unless you use tremendous upper-body strength.
3. Mobility in the hip joint.
If the hip joint is restricted, the horse will not be able to swing the hind leg very easily. Think of tightening your hip joints and then walking around. How easily can you swing your hind legs forward? All the joints in the hind legs need to move freely. If the pelvis is tipped up and out, the hip joint and the rest of the joints in the hind leg will be restricted. It will require a much greater amount of effort to get the hind leg under the body. You will have to force the horse through the resistance and make him bring the hind leg further under using very strong aids because the horse is not in a readily available position to bring the hind leg under. Often the sequence of the legs is interrupted and the quality of the gait is severely compromised as a result.
At this point you might already be noticing the interrelatedness of each of these points. Actually it is impossible to separate them because it is the combination that
creates the overall function of the skeleton and the horse. However, without some way to isolate individual events, it becomes a difficult concept to discuss. Therefore, I am
making these distinctions in order to give you some landmarks. Ultimately all these points must work together. If the horse is stiff in the lower back and has the pelvis tipped up and out, the hind leg will be restricted. If the horse is stiff in the hip joints, he will have difficulty engaging the hindquarters (flexing the pelvis under), etc.
4. Hind leg “tracking up.”
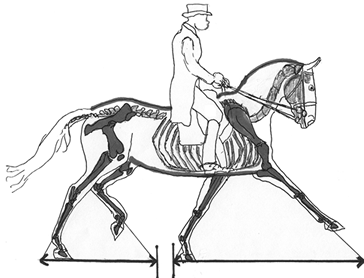
“Tracking up” means that the hind foot lands in the print of the forefoot as it leaves the ground. If the horse “over tracks,” the hind foot has landed in front of the forefoot print. If the horse is “not tracking up,” the hind foot has landed short of the forefoot. The purpose of tracking (also known as engagement of the hind leg) is so that the hind foot lands under the horse’s center of gravity. If the hind foot does not track up sufficiently, the push from the hind foot is going to propel the horse’s body forward and down rather than forward and up. Instead of being able to lift the front end, the thrust of the hind foot will send the horse more onto the forehand. The ability to “track up” can be dramatically influenced by conformation. A long-backed horse with short legs (i.e., a draft cross) is going to have a much more difficult time tracking up than a short-backed horse with long legs (i.e., an Arabian).
There are two ways the horse can swing the hind leg under. One way is to pendulum swing the leg much like the way a racehorse moves. The other is by dropping the pelvis and coiling the leg underneath. For lifting power the horse needs to coil the hind leg (fold the joints of the hip, stifle, hock, fetlock). A hind leg that has swung under like a pendulum will not have any lifting power. It will provide more forward thrust.
5. Lift in withers.
Perhaps this is the most important part. If the horse is up in the withers, the back can come up. There is room for the pelvis to drop and the hind leg can easily swing under the weight of the rider. Just because the horse’s back is up does not mean the horse’s withers are up. Many times the horse has dropped the withers down (which also drops the sternum down, since they are connected through the ribs) even when the back is up.
However, it is extremely rare to see a horse with the withers up and the back down.
Lifting the withers is critical to what happens in the front end of the horse. If the withers are down, the horse is on his forehand. The weight of the rider will be on the horse’s front legs rather than on the hindquarters. The ability to lift up in the withers is greatly affected by saddle fit and rider position. If you find your horse being unwilling to canter slowly, wants to fishtail his hindquarters to slow down or tosses his head in the canter transitions, it may be a result of his inability to lift up through the withers.
6. Release of tension at the base of the neck.
As the withers come up, the horse no longer braces through the sternum. The base of the neck stops working so hard and these muscles decontract. Once this happens, the horse will be able to raise the forelegs through the shoulders rather than primarily from the knee. The movement of the front legs will become more elevated and elegant.
7. Telescoping neck.
As the withers lift, the neck is able to lengthen or extend from the base to the poll in a telescoping movement. If the withers are down, the neck will shorten rather than lengthen. Often the neck appears to “grow” out of the withers and shoulders rather than appear pulled down to the withers when the neck lengthens. Look just in front of the withers; if there is a dip there, the neck probably shortened. If this area is full, the neck is lengthening when the horse is working.
8. Soft jaw.
The muscles of the tongue are connected to a small bone called the hyoid bone. This small bone floats inside the horse’s jaw area and is not connected to the horse other than through muscles. The muscles of the tongue attach to the hyoid bone as well as a number of other muscles including one that runs from the hyoid bone to the sternum.
When the sternum is down (withers down), the under-neck muscles tighten and restrict the tongue via the hyoid bone. This often causes tension in the jaw. As the withers lift and the neck extends, it is common to see the horse’s tongue come forward and rest on the back of the lower incisors. If the jaw is tense, the tongue is often busy and/or drawn back and the horse wants to open his mouth.
9. Poll the highest point.
The poll (the atlanto-occipital joint) is the joint between the top of the spine and the horse’s skull. When a horse is moving correctly, this point is the highest point in the arc of the neck regardless of the frame (shape of the outline of the horse). No matter whether the horse is on a long rein or ridden in a high degree of collection, the poll should be the highest point in the arc. Often the highest point is not the poll but rather the joint between the second and third cervical (neck) vertebrae. The horse is not in self-carriage if this is the case.
Is my horse carrying himself?
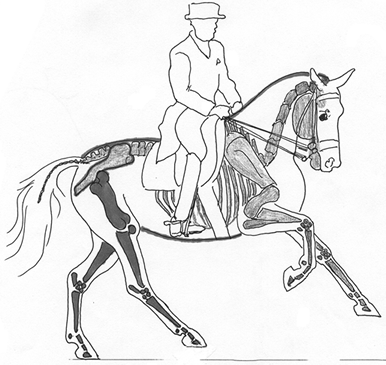
A quick way to check if the horse is carrying himself is to look for the poll as the highest point (the end of the arc), and whether there is a dip in front of and/or behind the saddle. This will give you a good indication of the overall picture. If there is a dip in front of and behind the saddle, the horse is most likely shortening its back rather than lengthening its back.
You can start looking for other details that confirm if the horse is in self-carriage, carrying his weight and that of the rider through the hindquarters or not. Another way to check if the horse is in self-carriage is to watch the poll. When the horse is moving, if the poll is pulsing forward and down (again this is regardless of the degree of collection or frame), the horse is lengthening through the back and is most likely correct. If the poll is pulsing back and up, the horse is shortening through the neck and back. The horse can be in self-carriage only if he is lengthening through the back and neck.
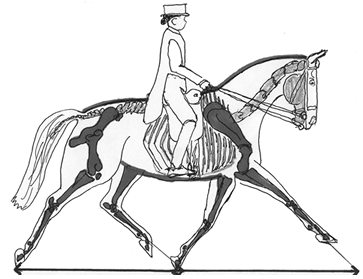
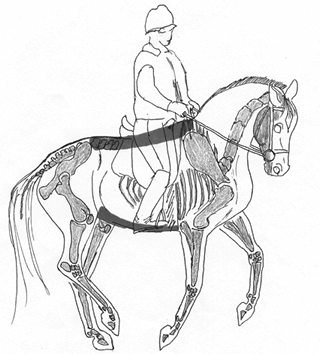
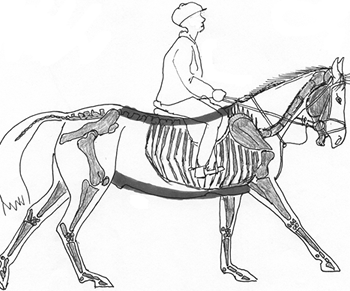
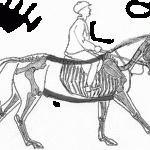
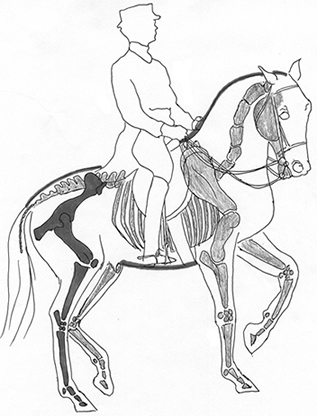
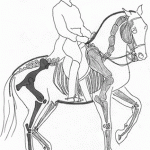
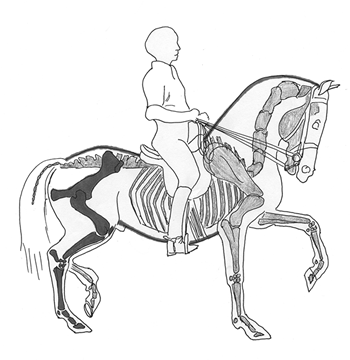
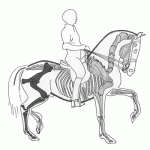
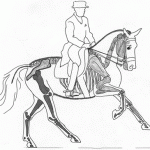
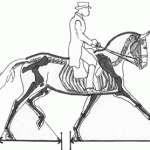
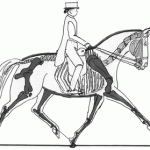
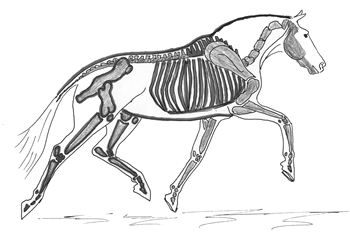
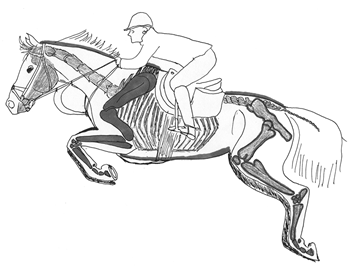
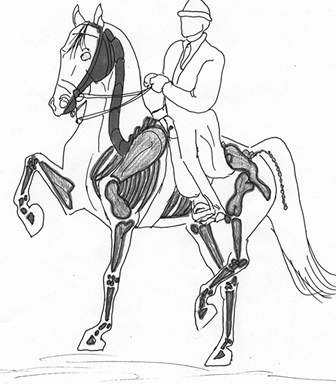
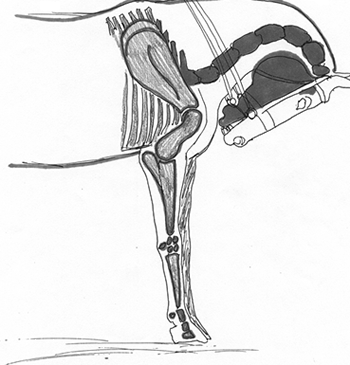
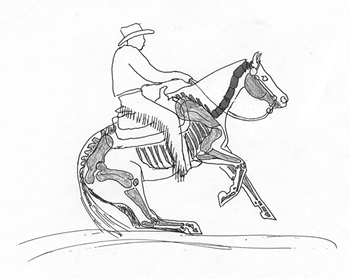
Hopefully this gives you a clearer picture of what the horse has to do to be in self-carriage. After you go through the drawings and captions once, go back again. Look at each for all 9 points in each drawing. Compare the images with and look for the overall patterns. Then grab a magazine and examine the photos. Begin to educate your own eye. Are the horses in the pictures in self-carriage?
In the next issue we will look at what the rider has to do. Perhaps you will have already figured it out before we get there!
This article originally appeared in Eclectic Horseman Issue No.15

