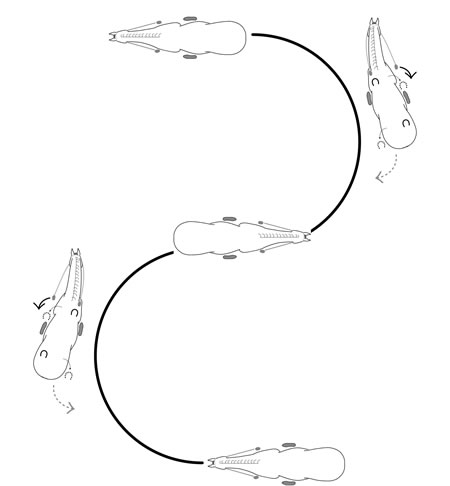
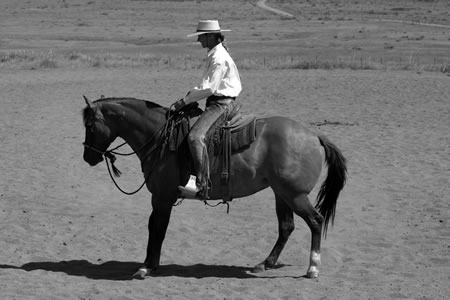
A backed serpentine should look just like a forward serpentine: a series of half circles connected by straight lines when changing directions.
(A.) Start by backing straight.
(B.) Back a half circle to the right.
(C.) Back straight before changing directions.
(D.) Back a half-circle to the left.
(E.) Finish backing straight.
Backing in a serpentine is a great exercise for discovering problems in your horse’s bend and flexion. It can help your leads, straighten out a horse that is backing crooked, and can improve your turnarounds as well as your timing and balance in general.
It is a helpful way to develop a clear idea of how your horse’s front and hindquarters reach. Many people have a difficult time feeling this when they are riding forward, but when they slow down and back a circle, or in this case a serpentine, they can get a better sense of what is going on underneath them.
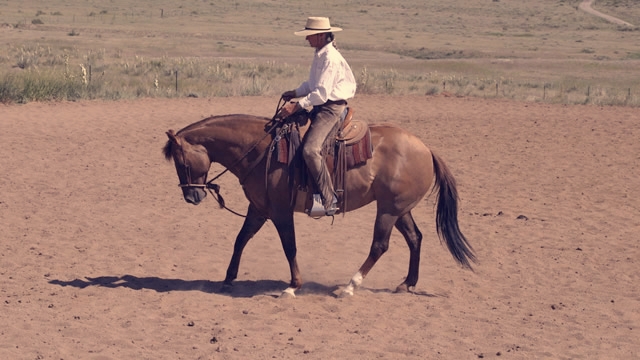
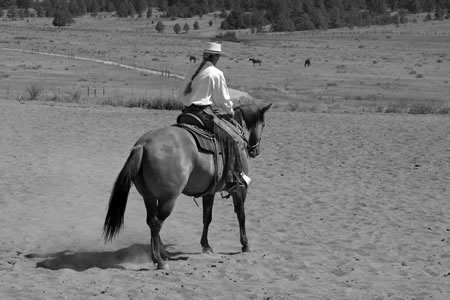
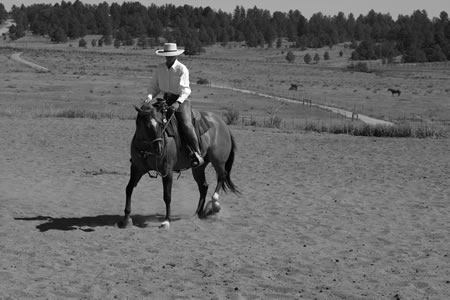
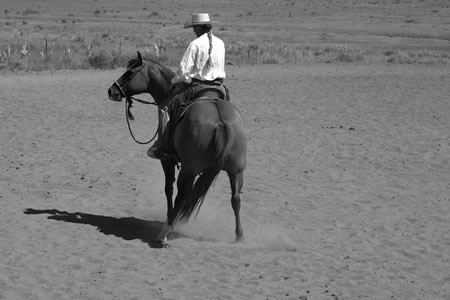
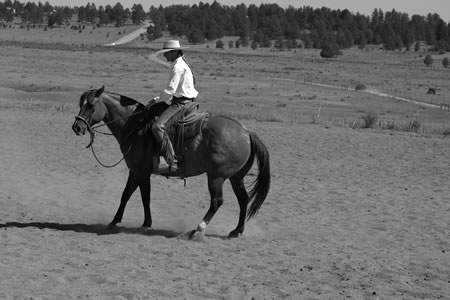
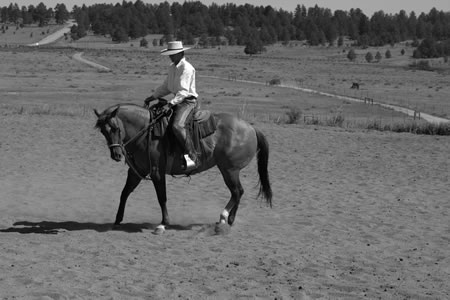
In the following series of photos I back some serpentines on my mare Sally. Note that Sally has her weight extremely far back. Your horse might not carry his weight as far back, and so will have a different amount of reach than this horse.
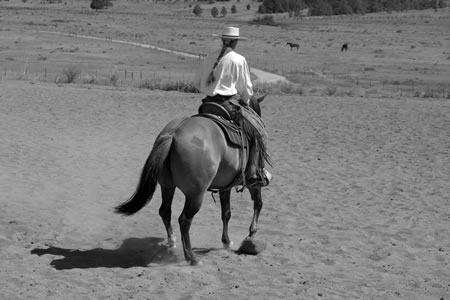
If I am backing a circle to the right, my horse is flexed to the right, just as she would be if I were riding a circle to the right. When backing a circle to the right, my horse’s hindquarters will be stepping to the left, as her front quarters are reaching to the right. Your horse’s feet move in diagonal pairs when they back. In the example above of the right circle, the “reaching pair” will be the right front and left hind, they will reach away from each other (right front to the right and left hind to the left). The “backing pair” in this case the left front and right hind will be stepping straight back.
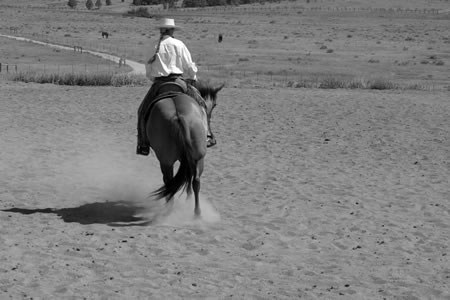
If you have problems in this exercise, your horse is either losing the flexion or the backing, or you are getting in your horse’s way. Reorganize by backing straight or by bending and stepping he hindquarters over as needed, then start again. I feel like I sit a little forward in this exercise to allow my horse’s hindquarters to come more under herself and allow her loin to lift. If I leaned too far back, it could inhibit her ability to engage.
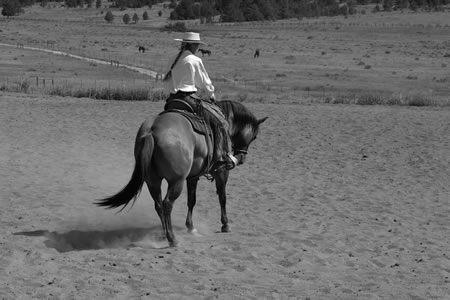
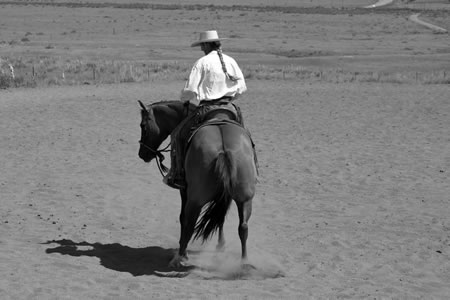
This exercise also highlights your imbalances in your ability to bend left and right. In these photos you might see that I have more difficulty shifting my weight to my right seat bone. This is can be from my body awareness, or something Sally is doing that is causing this difficulty.
The most important thing to remember in this exercise is to adjust. You will be learning to feel when your weight is in the wrong place or where you will need to make a change to help your horse. This is as important as the exercise itself. Moving your weight forward, back, left or right will vary how your horse moves. Find what you can do with your weight and position to help your horse be successful.
Serpentine: The serpentine consists of half-circles made alternately left to right and connected by a straight line.
1. Once my horse is backing straight and soft, I will ask her to back a right circle by taking my right leg back slightly, turning my body slightly to the right. My left leg will hang in place. Then I will widen my right hand. (Note the amount of engagement in this photo: Sally’s right hind leg is very close to her center of gravity.)2.I would like her right front foot to reach under my right foot, so that is how I adjust my hand position to try and encourage that much reach. Her left front-right hind diagonal pair of legs have just finished their step straight back. Her next step will be her right front stepping to the right and left hind stepping to the left.3. As we continue in our right circle, this shows my right leg back, and you can clearly see how my weight is shifted to the left. I like to feel as though I’m sitting slightly forward and over the outside shoulder.4.In this photo, I’m starting to straighten out. You can see my right hand is releasing the flexion, allowing her head and neck to return to the middle.5. In this photo you can’t see my left leg, but you can see that my weight has shifted to the right. I’m just getting ready to widen my left hand and ask for the flexion to the left. What I like about this photo is that you can see in my body that I have a harder time getting my weight to the right. You can see that she is getting ready to move her left hind leg. She should step it out to the left slightly.6.I clearly have flexed Sally to the left, but she has not quite completed her swing to the left circle. I have also not completely changed the bend in my body. My left shoulder is still too far forward.7. Here she is doing a nice job reaching her left front to the left and the right hind to the right; her flexion is good, my left leg is back, and my weight is now shifted to the right.8.In this photo, she has her reaching pair of legs on the ground, and her backing pair of legs are stepping straight back. You can see that I have the flexion with my inside rein, and my outside rein is slightly forward but is still telling her to come back.These three photos show the change of direction from a left circle (A.) to a right circle (C.).Photo (B.) shows that I’m getting ready to change from left flexion to right flexion. You can see my head is still to the left. I’m still thinking about the left flexion slightly, but I’ve already started to release her flexion to the left. As I change direction, I straighten my horse, and I straighten my body. I shift my weight to the new outside of the circle. Here I’ll shift from my right seatbone, to the center, and then to my left seatbone. I think about my hips being even with her hips and my shoulders being even with her shoulders.In Photo (C.) you can clearly see that I’ve shifted my weight, and she has switched to the new flexion.This photo clearly illustrates the proper amount of lateral and longitudinal flexion for this horse in this exercise.In this photo, you can see that Sally is still bending to the left but has lost her flexion and has stopped backing. I’ll ask her to step her hindquarters over to the right with my left leg, and start her backing again. Then I can regather her flexion.Continuing the sequence from (E.), Sally has begun
backing again and is beginning to recover her
preparation to back in her arc to the left.In this photo you can see that she has good bend and flexion to the left and is backing her arc correctly again.
This article originally appeared in Eclectic Horseman Issue No.30